
If you’re on the lookout for a tropical taste experience that’ll have your taste buds doing the limbo, you’re in for a treat. Introducing our Pineapple Limber recipe – it’s like a mini-vacation in a bowl!
Just think that the sun’s shining, a gentle breeze is swaying the palm trees, and you’re indulging in a frosty, pineapple-packed delight that’s as refreshing as it is flavorful. We’ve whipped up a recipe that’s so easy, even your kitchen blender will be impressed.
Pineapple Limber Recipe at a Glance
Prep Time: 10 minutes
Freezing time: 4 to 6 hours
Course: Desserts
Cuisine: Spanish
Servings: 4
Ingredients for Pineapple Limber Recipe
- 2 cups pineapple chunks (chopped with love)
- 1 cup pure pineapple juice (no peeking, sipper!)
- 2 cups water (aqua de paradise)
- ½ cup sugar (just enough sweetness to make your smile wider)
Equipment & Tools Required:
- Blender
- Measuring cups
- Cutting board and knife
- Freezer
Let’s try Pineapple Limber Recipe Step by Step
Just put on your fruit helmets, because we’re about to break down the Pineapple Limber recipe step by step. And let’s be honest, this recipe is like a tropical party for your taste buds – pineapple style!
Step 1:
First things first, gather your fruity squad. You’ll need your trusty blender (a must-have for any pineapple extravaganza), some measuring cups (because precision is cool), cups or molds (for freezing magic), a spoon (your ultimate Limber excavator), a cutting board, and a knife (to conquer that pineapple like a true warrior), and of course, a freezer (the chilly palace for your soon-to-be Limbers).
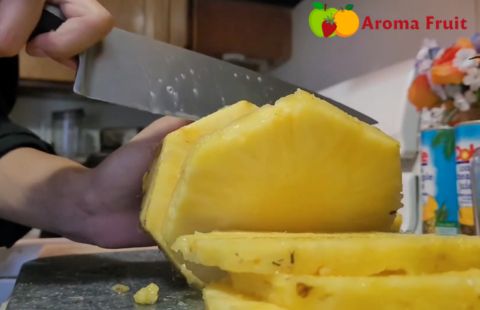
Step 2:
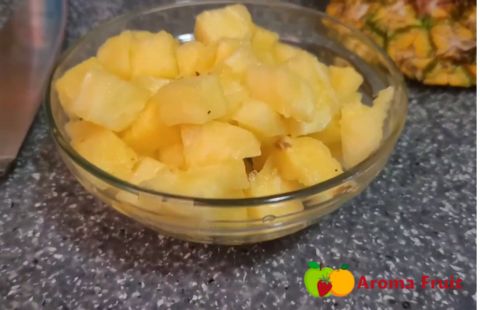
Get ready for the pineapple showdown! Place your pineapple on the cutting board and channel your inner fruit ninja. Chop those pineapples into delightful chunks, imagining you’re creating fruity puzzle pieces. It’s like a delicious game of Tetris, but with pineapples!
Step 3:
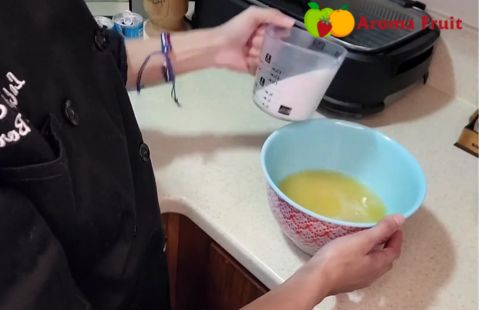
Now, the real fun begins. Toss those pineapple pieces into your blender – they’re the stars of the show, after all. Pour in the pure pineapple juice, add a dash of sugar (because even pineapples love a little sweetness), and don’t forget the water – it’s the tropical conductor that brings this symphony together.
Step 4:
Hold on to your pineapples, because it’s time to blend! Push that button like you’re launching a fruity rocket into flavor space. Watch as the ingredients come together in a whirlwind of tropical delight. And oh boy, does that pineapple aroma fill the air!
Step 5:

Grab your cups or molds and get ready for some pineapple VIP treatment. Drop a few pineapple chunks into the bottom of each cup – they’re the surprise guests who are about to make your Limber extra special.
Step 6:
Pour the blended mixture into your cups and salute them like the frozen heroes they’re about to become. Pop those cups into the freezer, and here comes the hard part – waiting. Give them 4 to 12 hours to do their icy magic. Patience, my fruity friend, patience.
Step 7:

Ding-ding! The moment of truth has arrived. Take your cups out of the freezer and gaze upon the frozen wonders you’ve created. Grab a spoon, dig in, and let the pineapple party explode in your mouth. Each bite is like a tropical vacation for your taste buds – the kind where you don’t need to worry about sunscreen.
So there you have it, the Pineapple Limber recipe, broken down step by step. It’s like turning your kitchen into a pineapple paradise! Now go on, give it a whirl and treat yourself to a taste of pure, frozen joy. Pineapple Limber recipe? Mission accomplished!
| Don’t Miss Out On |
| Cedric Grolet Apple Tart Recipe |
| Mrs Fields Banana Bread Recipe |
| Fanny Farmer Banana Bread Recipe |
Serving Ideas for Pineapple Limber
Hey, fruit adventurers! Ready to take your Pineapple Limber experience to the next level? Hold onto your taste buds because we’re diving into some super fun and seriously tasty serving ideas for your frosty creation.
- Tropical Toppings Extravaganza:
Let your Pineapple Limber shine like a fruity superstar by adding a sprinkle of shredded coconut on top. It’s like giving your frozen treat a cozy beach blanket to chill on. And hey, coconut and pineapple are like best buddies, so they’re a match made in flavor heaven. Pineapple Limber Recipe? Check! - Limber Float Party:
Why limit your Pineapple Limber to just cups? Drop a couple of these frozen wonders into a glass of pineapple juice for an instant Limber float. It’s like a mini parade of pineapples celebrating in your glass. Pineapple Limber Recipe? Check! - Limber Parfait Magic:
Layer your Pineapple Limber with some vanilla yogurt or whipped cream for a parfait that’s as pretty as a sunset. Alternate between spoonfuls of creamy goodness and chunks of your frozen creation. It’s like a dessert symphony that hits all the right notes. Pineapple Limber Recipe? Check! - Limber Popsicle Pizazz:
Get your popsicle molds ready because you’re about to level up your frozen game. Pour your Pineapple Limber mixture into the molds, add a popsicle stick, and let them freeze. Voila! You’ve got Pineapple Limber popsicles that are as cool as they are delicious. Pineapple Limber Recipe? Check! - Limber Cocktail Bliss:
Feeling a bit adventurous? Blend up some Pineapple Limber with a splash of your favorite tropical juice and a touch of your choice of spirits. You’ve just concocted a Limber-infused cocktail that’s perfect for a laid-back summer soirée. Pineapple Limber Recipe? Check! - Limber on the Rocks:
Feeling classic? Simply serve your Pineapple Limber as is, in all its frozen glory. Let the flavors do the talking as you savor each spoonful of this tropical masterpiece. Pineapple Limber Recipe? Check!
So there you have it, folks! A handful of creative ways to savor your Pineapple Limber and turn your taste buds into a pineapple party. No matter how you enjoy it, one thing’s for sure – each bite is a bite of happiness. Pineapple Limber Recipe? Double-check! Follow us on Facebook for a treasure trove of ideas that will keep your taste buds dancing and your kitchen buzzing.
Some tips for Pineapple Limber
- Pineapple Power: Choose ripe and juicy pineapples for the most intense flavor explosion. A little pineapple dance can tell you if it’s ready – if it smells like a tropical paradise and the leaves pull out with ease, you’re on the right track.
- Chill Like a Pro: Once you’ve blended your Pineapple Limber mixture, let it chill in the fridge for about 15-20 minutes. This way, the flavors can have a little party of their own before the big freeze.
- Layering Love: When you’re placing those pineapple chunks at the bottom of the cups, go ahead and channel your inner artist. Make it look like a pineapple sculpture garden – your Limber deserves the royal treatment.
- Cup Covers: If you’re using cups for freezing, cover them with plastic wrap before inserting the popsicle sticks. It’s like giving your Limber a cozy blanket to keep warm (or should I say, cold?).
- Unmolding Magic: If you’re going for the popsicle version, run the molds under warm water for a few seconds to help the Limbers release with ease. No one wants a stuck Limber crisis!
- Freeze Time Flexibility: Remember, the freezing time can vary. If you can’t wait to dive in, give it at least 4 hours. But if you’re a patient pineapple lover, wait up to 12 hours for the ultimate frozen paradise.
- Sharing is Caring: Pineapple Limbers are meant to be shared – they’re like little frozen bites of happiness. Invite your friends over, have a Limber party, and let the good times roll!
- Follow the Crumbs: Craving more fruity fun? Follow us on Facebook for a treasure trove of tips, tricks, and fruit-filled adventures that will keep your kitchen bustling and your taste buds thrilled.
FAQs on Pineapple Limber Recipe
- Can I use canned pineapple for the Pineapple Limber Recipe?
A: Absolutely! While fresh pineapples bring a burst of natural sweetness, canned pineapples can work wonders too. Just make sure they’re drained before joining the Limber party. - How do I know if my Pineapple Limber is ready to devour?
A: Patience, dear Limber lover! Give your frozen wonders at least 4 hours to freeze, but for the ultimate tropical delight, wait up to 12 hours. Your taste buds will thank you. - Can I add other fruits to the Pineapple Limber mixture?
A: Of course! Pineapples are the stars, but feel free to sneak in a dash of adventure. Berries, mangoes, or even a touch of citrus zest – it’s your fruity canvas to explore. - Can I use coconut milk instead of water for Pineapple Limber?
A: You betcha! Swap out water for coconut milk to infuse your Limber with creamy, coconutty goodness. It’s like a vacation in a cup! - What’s the best way to serve Pineapple Limber for a party?
A: Get creative! Turn your Pineapple Limber into popsicles, floats, or parfaits. And hey, don’t forget to share your fruity masterpieces on Instagram and Twitter.
Our journey through the world of Pineapple Limber Recipe has come to an end – but fear not, the frozen fun doesn’t have to stop. With just a few simple steps and a touch of pineapple magic, you’ve turned everyday ingredients into a tropical delight.
So, whenever you’re in need of a sweet escape, remember the Pineapple Limber Recipe and let your taste buds do the limbo! For more fruity escapades, follow us on Instagram and Twitter. Stay frosty, fruity friends! (Pineapple Limber Recipe: Mission Accomplished!)
